Turquoise and red were made for one another. I adore mixing cool and warm colors anyway, even though a lot of people say not to (gray and orange, for instance--a BEAUTIFUL look!). I think that part of what makes this combo work is the fact that Turquoise itself is a warm blue. And I love the look of turquoise with an especially warm and somewhat dark red. They just match!
With that in mind, I was in the process of deciding what I was making for my card exchange this month. I knew that turquoise and red had to be a part (I had just finished making five Mother's Day cards with this color combination front and center) and was absolutely thrilled to stumble upon this idea that I'm about to share with you.
Great artists aren't those who have the best ideas--they're those who have the best accidents.
(That was pretty close to brilliant, if I do say so myself.)
Supplies needed to create this exact awesomely cute embellishment are as follows:
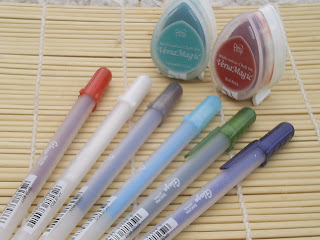
VersaMagic DewDrop Chalk Inks in Turquoise Gem and Red Brick (they come in the same set--so smart!)--first picture
Sakura Glaze Pens (these are relatively new on the market, I think, and I absolutely love their fun look--the pens pictured here all come in a set--I used every color except the white and the dark blue)--first picture
Casablanca Clear Stamp set from BasicGrey (I LOVE BasicGrey!!!!!)--second picture
White cardstock cut into circles--2.75", 1.5", and 1.25", one of each for each embellishment. I used my Cricut machine to cut the circles, but alternatively, you could use punches, or just cut with scissors around your stamped images. I'll explain more in a bit about this because of one of the steps, so keep reading!
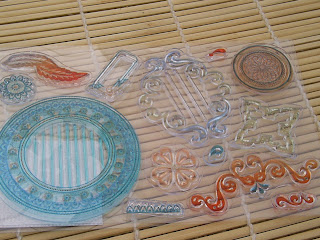
Okay, so this is what we're actually making:
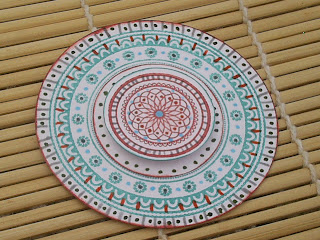 It's so much easier than it looks! Seriously, step by step... it's not that hard. And, yes you can do it. Yes you can. Don't argue!
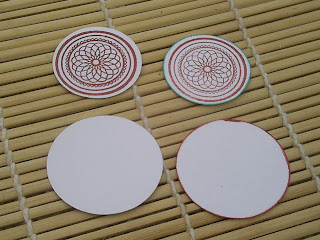
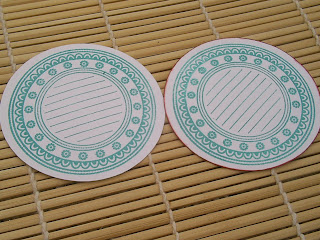
Stamp your images as follows: the stamp shown above on the 1.25" circle in Red Brick. The stamp shown below on the 2.75" circle in Turquoise gem. Leave the 1.5" circle blank. Once stamping is complete, ink the edges of each piece as follows: 1.25" circle with Turquoise Gem, 1.5" circle with Red Brick, 2.75" circle with Red Brick. (The first circle in each image is without the inked edge, the second circle pictured shows the edges inked.)
 Once you've completed the above step, assemble the piece as pictured below at left, and as described: Adhere the 1.5" circle to the center of the stamped image on the 2.75" circle, covering the lines. Adhere the stamped 1.25" circle to the center of the two circles with foam tape or other dimensional adhesive.
About the circles: You don't have to have some fancy machine or punches or whatever to make this embellishment. You can do it with scissors! Simply stamp the two images in the colors listed above and cut around them, leaving a bit of border all around. Please don't be crazy about trying to make it super perfect. "Perfect" is what it's called when you can make something without beating yourself up about how it looks the whole time. Consider the first one practice, okay?
Now, to cover the lines... Either you can try really hard not to get ink on them as you stamp (which is easier said than done in many cases), or you can do a technique called masking. You won't get the inner ring of Red Brick around the circle in the center of the larger design, but it's fine. Stamp the larger image on a paper. Cut out the center lines, discard the rest of the stamped image. Lay it down on your cardstock. Stamp over the piece of paper, making sure it's centered under the lines of the stamp (with clear stamps, you can do this!). Pick it up, peeling the extra paper away from the stamp itself if necessary. You've just blocked the inked lines from being stamped! Look how clever you are! Now you can move on to coloring the embellishment, which is, I think, the funnest part!
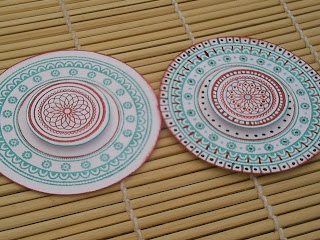 You need to be careful when using the glaze pens. Don't touch what you color/draw until the ink is absolutely dry, or you'll mess up the glaze effect. This is the main reason I work from the center out. If necessary, allow each color to dry before moving on to the next color.
Using the light blue pen, color in the center of the smaller stamped image and place dots along the outer edge of the intricate inner decoration, as shown. Place dots in between the flowers inside the ring on the larger stamp, as shown.
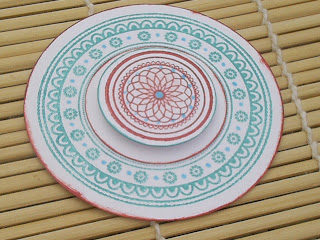 Using orange, color dots inside the intricate scroll work of the central piece, as shown. Draw lines coming out from in between the arches on the larger stamp, as shown.
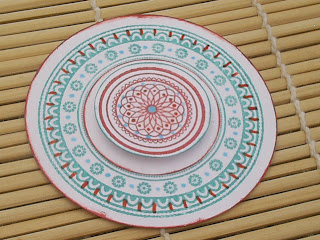 Using the gray pen, color in small lines in between two of the rings on the smaller, center circle. It can be somewhat hard to do this one since you're coloring against the air, but you'll get through. The pens flow quite nicely! Color dots on the centers of the flowers on the larger stamp. Now color lines all along the outside edge of the larger stamp. Be careful to handle only the edges of the piece as you're turning so that you don't mess up the glaze before it sets--alternatively, you could let the lines on the middle circle dry and then use that to turn the embellishment as you color.
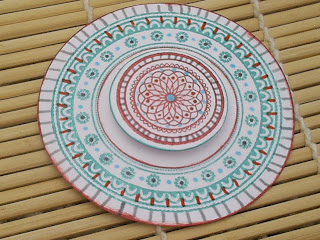
Now, using the green pen, color dots on the inner circle piece, all around the smaller stamped image. Color dots in between the gray lines you drew in the last step, again, being careful not to smudge any of the wet glaze ink. Now you're ready to attach your awesome embellishment to the front of a card, or for use in your scrapbook, or whatever!
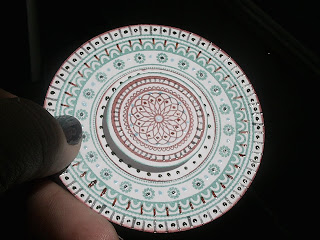
 Look at how fun the glaze pens look in the light. They shimmer a bit, and really add that "I so bought this instead of made it" look to your crafts which, I must admit, is what I'm usually going for.
 Even if you don't have these exact supplies and won't create this exact project, I encourage you to experiment with stuff like this--working a tiny bit at a time to create something that looks complicated!

I love how those embellishments turned out. So cool!
ReplyDelete