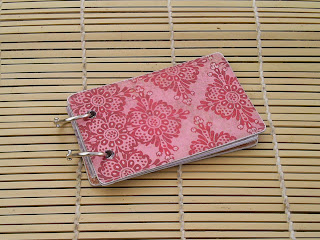
Gift Card Mini Album a la Kathy
Materials:
-2 credit card sized plastic cards that you can get rid of (I'm using an old DQ card and an old insurance card... just make sure you're not using a real credit card or any other kind of card with raised numbers on it. Your cards need to be totally flat.)
-Good glue, such as Scotch Quick Dry Adhesive (which I LOVE because it dries so fast!)
-Papers or cardstock for covering the cards
-Cardstock for inner pages
-Binder rings
Tools:
-Sanding block (mine is fine grit, picked up at JoAnn)
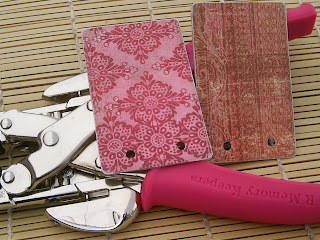
-Cropodile Punch and Eyelet setter (necessary for punching holes in the cards)
-Bone folder or BasicGrey rubon tool (optional)
-Ticket Corner punch (optional)
-Scissors
1. Start off by sanding your cards until they're no longer shiny, and you can see some of the sanding scratches on the surface.
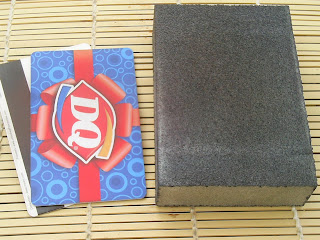
2. Once sanded, your cards are ready to receive glue and paper! Put a bit of glue all over the surface of the card, but not TOO close to the edges. With your chosen paper wrong side up, press the card into the paper. If you don't want to burnish the card, then just push pretty hard and it should be good. To ensure a great connection, though, flip the card and attached paper over (before cutting!) and rub on the paper (looking at the front of the paper now) with the rubon tool (using the black paddle at the end) or a bone folder. This ensures that glue gets between the card and the paper well, and eliminates possible air bubbles (which aren't likely to form if you're pressing the card with glue onto the back of the paper on a flat surface, like I said before). Be advised, however, that you'll end up squooshing (the technical term) glue from the sides of the card by burnishing it. Just flip it back over and use your fingernails to scoop excess glue from the edges of the card. Let it dry.
3. Cut with the scissors as close to the edge of the card as you can without cutting the actual card, then sand only the edges of the paper so that they're even with the card. With the paper facing you, sand only down around the edges of the card, paying attention to the corner, too.
(Picture shows step 2 in progress [the DQ card] and step 3 already finished [the tan flowery paper on the left]) Once one side of the card is finished, repeat steps 2 and 3 on the other side of the card.
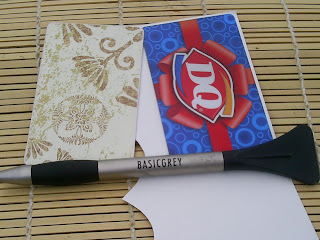
4. Decide where you want your hole(s) and make marks on one card with your desired front paper facing you. Using the Cropodile, center the mark in the 3/16" hole puncher and punch through the card. Decide which side of the other card you want to be the back of your album. Face that side towards the back and hold the two cards together, the front cover with the holes facing towards you, and the back cover without holes facing away. Sandwich both of the pieces into the cropodile, centering the previously punched holes in the 3/16" hole puncher, and punch the holes into the back card piece.
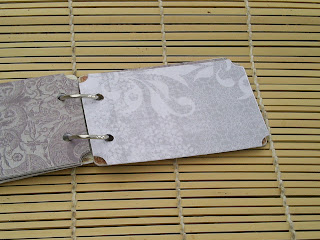
5. Cut pieces of cardstock for your pages (these cards measure 2 1/8" by 3 3/8"). I like to make two pieces of cardstock per "page" in the album. I've made seven pages for this album, so I cut fourteen pieces of cardstock. Before gluing their wrong sides together, I used my ticket corner punch to punch the corners of the pages. This ensures that their corners aren't sticking out of the edge of the album. Alternatively, you could cut each individual piece against one of the covers and get rid of the extra corners. I'm too impatient for that, so I just used my corner punch. I'd use the cover to cut the corners with my scissors if I was using only 1 ring and setting it in the corner.
6. Once you get the pieces cut and glued together, get your pages arranged in the order you want them in. Sandwich up to four of these pages (remember, two cardstock pieces per page, so you're actually cutting through 8 layers of cardstock--like butter! [oh, I LOVE my cropodile!]) behind the front cover and center the holes in the 3/16" hold puncher. Punch the cardstock holes. Take your remaining pages and do the same, so that all of your pages are punched and the album is ready to be assembled.
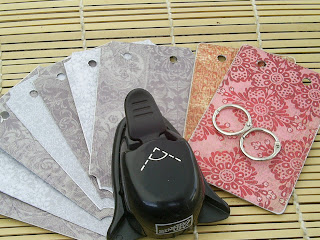
7. Using the binder clips, put your album together! Keep the front cover facing the front and the back cover facing the back.
Here's a shot of the album open. Isn't all pretty inside with those cute, muted papers and the corners punched out?
Now, you could ink edges or do any other number of decorative stuff to these albums. They are TOO cute. They fit 2x2" cropped pictures very nicely, and you could include some kind of sentiment or saying or whatever. Just keep in mind that when choosing your embellishments, keep them relatively thin and also remember that you can't really poke a brad through one of these pages (it'd stick out on the other side). If you do decide to do that, you have to design something on the other side of the page to cover your ends up. I have NOT found that it's okay to do brads or whatever before gluing the pages together. The extra bulk between the cardstock pieces distorts the final page every time.
STORING SCRAPS!
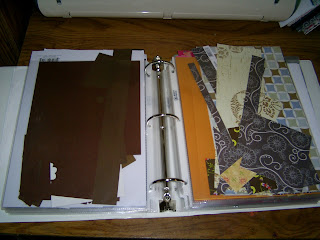
Okay, now here's a shot of my big binder of scraps. I love this thing! Since I started using it, I'm almost never cutting up new pieces of paper. In fact, the entire mini album I just made was made completely from scrap pieces in my scrap binder.
This is an awesome way to use what you have and stop being so wasteful, both in an environmental and a financial sense. I know that if you don't have a scrap storage system, you're probably like I used to be--with huge amounts of space in your area devoted to scraps, but they never seem to get used because it's almost impossible to sift through them all!
I use a 2" binder filled with 8.5x11" page protectors. I store solid colors in one protector, then directly behind it I store patterned papers or cardstocks that are primarily the color of the solid papers directly in front of it. For instance, in this picture you can see my brown section. I've got solid colors of brown on the left and papers that are primarily brown, or make me think primarily of brown (such as the large piece that is mostly blue and green, but all I see are the brown squares, so it goes in the patterned brown paper sleeve) on the right. You can see the beginning of my orange section directly behind the brown patterned paper section.
This way, when I go to do a project, I look first through all of my scraps and pick out pieces that will work. I am saving SO much money this way! And I know I'm doing something good for the environment. If it can help anyone else with their own paper issues, I'd be happy to hear about it! ^_^

Hi Kathy,
ReplyDeleteI followed your link from the About. Com Scrapbooking forum and I just love your blog! That mini album is too cute..and such a clever design.
I am also a hoarder of scraps...but my scraps take up a whole plastic crate!