I used my Adobe Photoshop Elements 2.0, so if you have anything higher than that, you should be able to do this, too. I did some screen prints so that you could see exactly what I was clicking on in a couple of these shots.
First thing to do is grab a scrap of cool patterned paper that you have lying around. Either use that plain or rough it up like I did. Just crumple it several times, even sanding a bit on top of the crumpled pieces to get extra wear and tear, and you'll get a cool texture to work with in the program.
Scan the paper into your computer at 300 dpi or ppi and open the image up in Adobe Photoshop Elements (from now on I'm calling it APE... lol... that spells ape! Why do I find these things funny?). If you don't know how to do that, consult your scanner instructions or, if you're lazy like me, google "How to scan at 300 dpi with ..." and insert whatever the name of your scanner is. You should pop some instructions up.
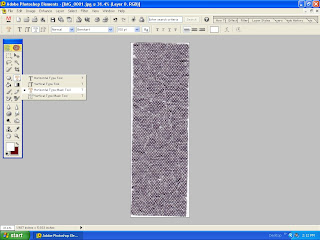
Now, to create a letter, and using your little toolbar (either off to the side, like mine is, or up top if yours has merged with the top), click on the type tool. Specifically, click the "horizontal type mask tool" option on the little drop down menu that pops out, as the screen print below shows.

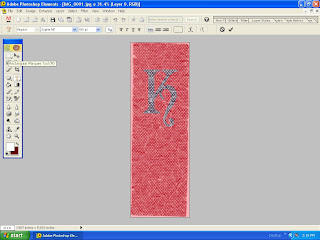
Once you've done that, you can choose your font and size (I chose 150 pt. Sophie MF... type 150 into the area where it shows the size option or whatever size you want if you don't see it on the drop down menu). Click at some point on your image and type the letter. It turns all weird and red, like the screen print shows below in my APE program.
Once that's done, go over and click on the Marquee Tool. That should make the red background disappear and let you see the letter shape selected. Once you see those little blinkie lines traveling around the shape of the letter, you can go up to Edit and click "copy", then over to File and click "New from clipboard".
You should open up a separate image that shows only your letter, but it's all cool and textured and looks very unlike a plain ol' letter. (Sorry to not have screen prints of all the junk I just said, but for whatever reason, the compy wasn't letting me do it, or I was probably doing it wrong.)

So just repeat the steps for another letter. Or, if you were smarter than me (which you probably are, especially if you know that technically, gramatically speaking, I mean, I should have said, "If you were smarter than I," instead) you could use a much larger scrap of paper than I did and type out an entire alphabet this way. Copy the entire thing, then open a new document. From here, you'll use the rectangular marquee tool and copy each individual letter, then open a new document, and save the letter as a separate file. Or you could just save the entire alphabet all typed in one layer and as you scrapbook, just copy and paste each individual letter you need to the document.
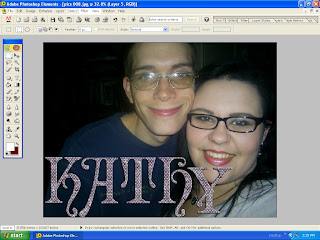
Here's a silly example I did, using a pic of me and my hubby from Valentine's Day this year. I put my name. Using the layer styles options (over in the tabs at the upper right hand corner of the screen), I went into the "bevel" options and chose "simple out" to make these look all 3D. I then went through the "drop shadow" options and chose "soft edge" to make it look even better. All of this work barely showed up on the dark background, but I think they still look pretty cool.

So maybe next time you go to buy a digital alphabet somewhere, you'll remember about this tutorial and be able to make some of your own. Hope it was helpful!
Oh, and I'm typing this pretty late at night after teaching a class at JoAnn and I'm not entirely clear right now, so if I left some gaping hole in the instructions, please let me know and I'll fix it post haste!

No comments:
Post a Comment