So here is the REAL 6x6" mini album as I make it. It seems complex at first, but is really quite easy once you know all of the pieces.
Kathy's 6x6 Mini Album:
Supplies:
If using double sided cardstock: 2 12x12 sheets
If using single sided cardstock: 4 12x12 sheets
Glue (I love Scotch QuickDry Adhesive)
Ribbon, 18-24" (I don't ever go bigger than 1/4" thick)
Stamping inks, if you want to ink edges
Tools:
Slide Cutter/Paper Trimmer
Bone Folder
Paper piercer (something to poke holes in the paper, the ends of very sharp scissors work, too)
Tapestry Needles (For sewing ribbon through holes. Mine are DMC size 22.)
Instructions
(My pictures show the steps to make the album with single-sided cardstock because it's more complex.)
1. Choose which of your papers you would like to be your cover.
These are the pieces that you'll cut to make your album:
For double sided cardstock, cut only A and B pieces. For single sided cardstock, cut all. Choose your own colors for the inside pages. After choosing the cover, I usually just let mine be random.
A: 6x12 (1) (This is the cover piece)
A1: 6x5.75 (2) (These are the two pieces you'll cut to glue inside the cover if you're using single sided cardstock.)
B: 5.75x11.5 (3) (These are the pages of the album.)
B1: 5.75x5.5 (6) (These are the pieces you'll cut to glue inside the album where the single sided cardstock leaves white pages.)
The picture below shows all of the pieces cut and ready to work with.
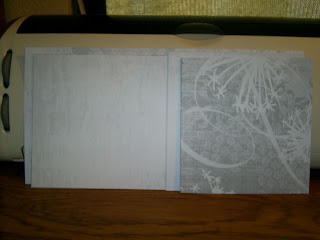
2. Take piece A and the three B pieces and fold them in half, with the white side inside (or the secondary design inside, if using double sided cardstock), as shown in the picture below. They will sandwich together and form the album, as shown.
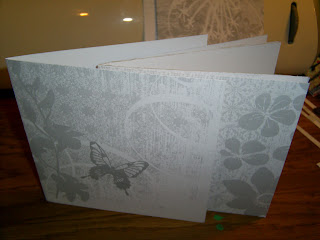
3. Leaving piece A folded, measure 1 1/4" down from each end on the fold and make a small mark. You may prefer the look of a slightly smaller tie on the outside, in which case you can measure 1 1/2" in from each edge. My example below shows both measurements marked. I typically do 1 1/4".
4. Using your piercing tool, poke a hole through the paper at the fold, one through each mark.
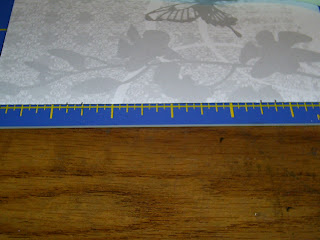
5. I started inking the edges of my papers here so that they'd be easier to see (but it also looks cooler, I think. ^_~) Center a single B piece over the OUTSIDE of the cover, as shown below.
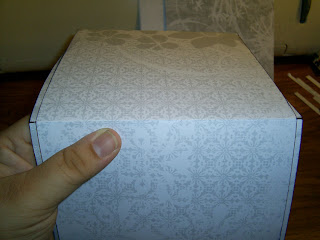
6. Because the cover is on the inside of the page, you can see the holes from the inside. So, keeping everything centered on the outside, and using the holes already punched in the cover as your guide, pierce the page as shown below once through each hole.
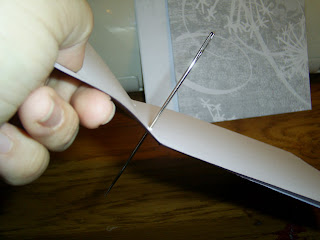
7. Set the cover (piece A) aside. One at a time, complete step 6 with each of the other two page pieces (2 B pieces), only instead of centering, just align them as shown in the photo below and pierce the holes, using the holes in the first pierced page as your guide.
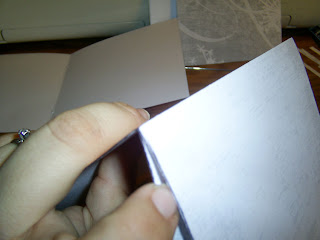
8. Once all three of the pages are pierced, check to make sure all of the holes were aligned by stacking it all together and piercing through the holes. They should be perfect if you actually did things one page at a time like I said, but you should still check.
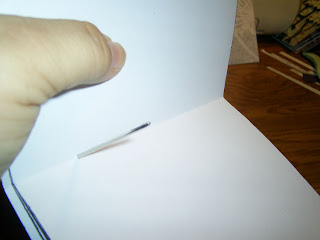
9. At this point, if you want to start getting fancy and inking all of your edges, as well as the outer and inner seams of the pages, have at it. The middle is going to show as the pages are turned in the finished album, and, like I usually tell my students at JoAnn: it's these little details that take your project from "handmade" to "handcrafted".
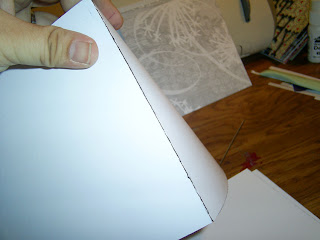
10. Take your cover (piece A) and set the A1 pieces on either side, making sure you have the right length facing the right way (you should have the piece covering the entire cover from top to bottom [unless your cutter misbehaves like mine did and you end up with slight shortages] and there should be a 1/4" space between the fold in the middle of the cover and the beginning of your A1 piece, as shown below. I always tell my students to do a "dry run" before gluing pieces like this. For instance, I did cut these slightly too short, but I was able to see that and figure out where I had to glue it to make it look good BEFORE the thing was covered in adhesive and very difficult to move around. It's worth it to check.
11. Glue the inner cover pieces (A1 pieces) to the cover as shown below. If you did your dry run, you shouldn't have had very many problems, if any at all. Set this piece aside.
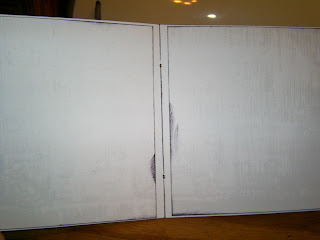
12: Take the rest of your book pieces and assemble them the way you want them to be BEFORE gluing them. This entire step is a dry run! Sandwich the pages (3 B pieces) however you want them to go. Insert your B1 pieces every place there's a white spot, like you see at my left hand page below. Make sure, again, that you're lining up the correct height and width. There should be a 1/4" space between the fold in the middle of the page and the part you just glued in. Also, I'll say that I think we scrappers waste too much time on steps like these. Seriously, if you picked well coordinated papers, this step can be completely random and it will still look great. You may want to ensure that you always have a different paper another, or you may decide to do a 2 page layout in here somewhere and you want the two papers the same. Either way, just get it done. Don't agonize over it!
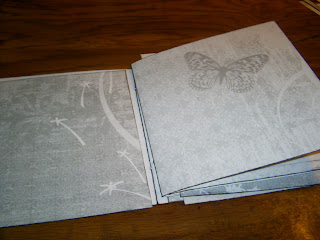
13. Go through the book now and begin gluing the pages. I tend to find it easiest to just do it with the album semi-assembled like in my picture below. I go through, flipping pages, and gluing the loose ones down wherever required. This step is super fun! The book is starting to look like something!
14. TIME TO SEW!!!!! Put your cover over your inner pages. Thread your piece of ribbon (18" usually works well, unless you want a big, flashy, droopy thing, then go with 24") onto your tapestry needle and thread it through all of the pages, starting from the OUTSIDE of the book, like the picture shows.
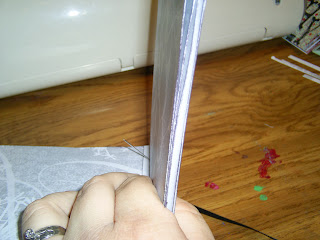
15. Leaving a long tail on the outside of the book, go through the other hole, to the outside cover, as shown below.
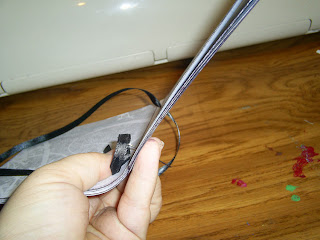
16. Pull the ribbon snug against the inside of the book and unthread your tapestry needle. Even out the ends of the ribbon. Look inside and see if your ribbon got all twisty (it probably did). If so, Pull the ribbon up from one end slightly and smooth the ribbon on the inside to at least as long as the space between your holes. Look at the picture below.
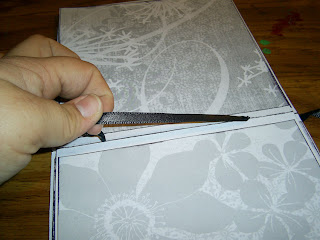
17. Still holding onto the ribbon at that spot, pull the tail on the outside of the book until you have to let go. Your ribbon should be nice and straight again.
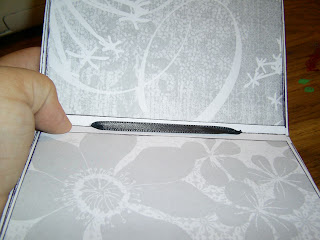
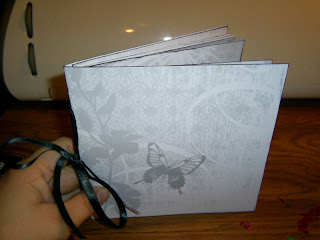
18. Tie it all up! On the outside, I usually tie a square knot and then a double-knotted bow. You could tie a little less securely if you want to add a page later, or if you mess up and decide you need to remove a page, or whatever. But I usually just tie it all up because I'm not sure what I'm going to do with it yet. Like this one... I have no idea. But I like the grays a lot!
Tips:
-Using double sided cardstock makes the entire process faster, but not as sturdy. In the method used above, you get two layers of cardstock per page instead of just one. It's still not that big of a deal, but it's something to consider before you make your project.
-Using actual glue (such as Scotch QuickDry Adhesive, which I LOVE... did you know that yet??? If not, you haven't been reading my blog until now, have you!?) instead of a tape runner seems to end up making the whole thing less bendy when you're done. I guess the glue dries harder than a tape runner. Also, it holds together better over the long run. Using only a minimal amount of glue greatly diminishes the possibility that you'll end up with puckers in your finished piece. Seriously, it doesn't take much!
-I do special cutting on these because I like for everything to be contained inside of the cover. You could decrease the time it takes to make this project simply by making it up of 6x12 pieces of paper. The finished product never looks quite as nice, but if you're in a hurry, it works.
Here are a couple of other finished examples I've made:
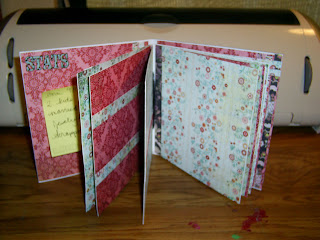
This one is going to be a chronicle of my weight loss. I purposely used a photo of myself at my max weight where I was dressed up, smiling, and happily doing crafts. I entitled the album, "Kathy or Something Like Her" kind of as a statement of this cover photo not showing the real me, specifically as our modern culture views overweight people. No matter how much thinner I am now or how much thinner I ever will get, I will never be more "me" than I was at that point (dressed up all girlie and doing crafts!), but everyone seems to view me differently. Anyway, I know people are trying to be nice when they congratulate me on my progress, but on some level it feels insulting, as if losing weight is progress of my person rather than progress of breaking bad, unhealthy habits. I mean, I'm no more worthwhile as a person now than I was then, and no matter how thin I get, I will never be worth more than I was at that moment. I will always be worth exactly the same. It'll just look a little different. I don't know all of that makes sense, and it's probably a bit too personal for this post, but here it is.
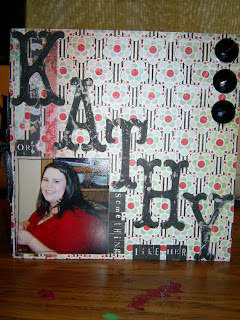
This is the inside of this album. I'm not sure quite yet what's going on all the pages, but while I'm still in the planning stages, I'm sticking post-it notes with notes on the inside. I know that the second page is going to be a before and after kind of thing. The rest of it is going to include a lot of my reflections on this entire stupid process. ROFL... Okay, I guess I got myself in a mood by talking a bit up there about this whole thing. But this one is too personal to NOT explain. ^_^
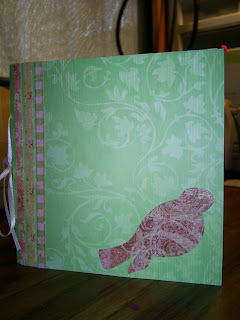
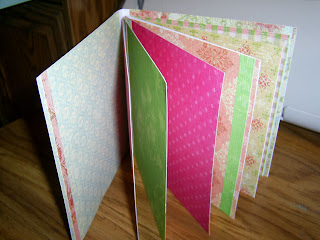
Here is one other album I did, completely blank, and not at all decorated yet. I think I might turn this one into a present album for pictures of my friend's little girl. I don't have girls of my own and I really need to use all the pink, girlie stuff I have on SOMEONE besides myself! ^_~

Wonderful tutorial! I sometimes find it hard to follow explanation without pictures so I love show-and-tells!!
ReplyDeleteGood tip about inking the pages to give it that extra something!