Note: This isn't done with the software!!!! If you have the software, then good for you. The first smarty who posts that I need to get the software can feel free to buy it for me, mmmmkay?!
Basically, I make a lot of cards, and I really enjoy decorating the cards with somewhat large pieces from my Cricut. However, sometimes it's really hard to know what size to cut of a certain image. The first one I'm showing below is a good example.
FIRST, I've got to clear up what you're selecting when you're selecting the size of your image. This was one of those moments of brilliance from Friday that I just LOVE to experience when I'm around other crafters. A few of the other ladies who own a Cricut and I were talking a bit and I mentioned (with much agreement from them) that I had a really hard time remembering when I selected my size if it was selecting the measurement from top to bottom or from left to right. One of the ladies, however, spoke up and said, "Well, it's top to bottom, isn't it?" And I said, "But how do you know? I keep meaning to write it down, but I never do." And she said (genius!), "Well, when you cut a 2" letter, it's 2" tall. So I think it's top to bottom." And NOW I'll never forget. And if anyone is just laughing at me for being so naive, that's okay. But if anyone else is with me on this and having an epiphany moment right now, I embarrassed myself just for you and it was worth it.
Okay, okay...
The thing I'm cutting right now is from the Storybook Cartridge. I'm cutting the swirlie twirlie border piece you get in the extras from the #2. If you look at the image, it's wider than it is tall. But I want it to go across a piece for a card. This is the kind of thing I'm talking about with figuring sizes--How do I know how tall to cut it when I don't know how wide it will end up being?
So, this is what I did...
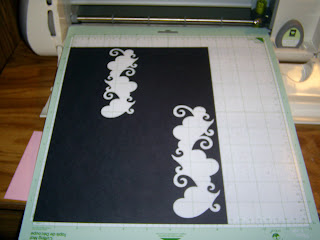
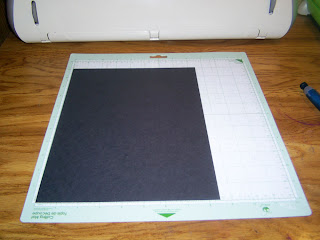 I set an 8.5x11" piece of paper in the bottom left hand corner. (8.5x11" is just what I had lying around... anything bigger than what I'm describing will work.)
I used my arrow keys and moved the blade to the left, to 7.5", then I moved it down to 6.25" and hit the "set paper size" button. It set the paper size as 4.5x5.75". Now, I know a standard card is 4.25x5.5", but you'll understand why I set it bigger in a sec.
Now that I've done this, I can hit the "fit to page" button. I'll select "Tall", then press "shift", and then press the "2" key. This will give me my swirlie twirlie border. Now, make sure (for your own future reference) that you're keeping a notebook right by you so that you can jot stuff down as you do this yourself, for whatever thing you're trying to cut to the size of your card or whatever, because when you hit "cut", you'll see the little screen says, "Calculating fit to page", then it shows you the size, which in this case is 2". It cuts the piece, fitting it to the 4.5x5.75" page size, which gives you a nearly perfect piece for the standard card which is slightly smaller because the Cricut NEVER cuts all the way to the edge of the page.
Now, keep in mind which edge you want your piece to align to (the 4.25" or 5.5" side). You may have to experiment a bit to find the right orientation for each project (you may need to have the blade go 6.25" left and 7.5" down instead, to get the card rectangle flipped). BUT, if you keep a notebook with you, like I said, you'll have the information for future attempts and will not need to go through all of this figuring again. AND... IT'S ONLY PAPER! You can recycle it if you mess up.
Below is the piece that the Cricut cut, which fit the card pretty nicely. Remember this is Tall, Shift, 2, set at 2". Now... this wasn't good enough for me at first. So I thought I'd try it at 2.25" just to see what I got, and see if it'd match better.
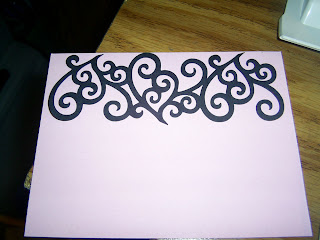
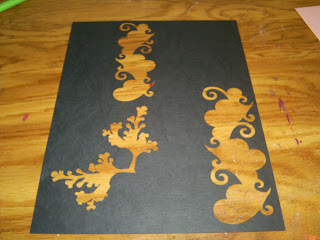
I put the paper back on my mat, but just let it be up in the corner, like you see below. I know that the piece I'm cutting isn't going to be too big for this paper, so I don't have to worry about aligning it in the bottom corner and setting the paper size. I'll just cut from here, the same image as above, at 2 1/4". (Make sure you turn "fit to page" OFF before doing something like this right after your last cut.)
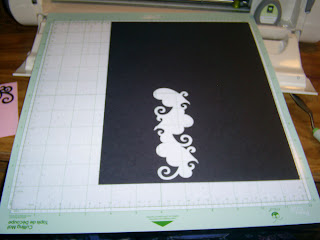
Okay, it turned out too big! So the other one is the one I love. I'll use the extra for something else at some point. OR, it could also be put on a card, but have the extra hanging parts cut off. You just have to decide which you'd like better.
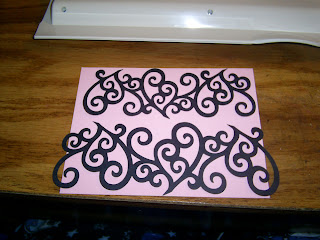
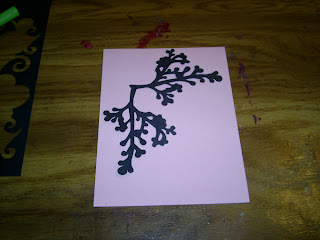
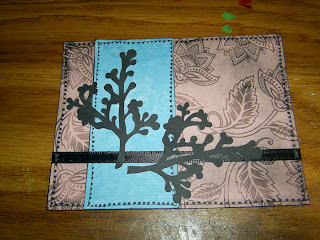
So I did those two things and figured I'd do one more thing on this paper. I aligned it in the bottom corner like I did at first and went over with my blade 7.5", then down 6.25", then set paper size to get my 4.5x5.75" piece of paper set in the Cricut. I chose a pretty branch corner piece. Once again, select fit to page, and then select your image. In this case, "fancy/corner", then "shift", then "Z". Again, before you press cut, get your notebook ready so you can remember the size once it pops up on the screen. I hit cut, then saw the size pop up as 4". Now I know that if I want to use this branch again, I need to cut it at 4" to fit well on a card.
Below is the picture of my branch. Pretty cool, huh? ^_^
Now, one of the things people talk about a lot is what to do with the leftover paper you have from cutting stuff on the Cricut. You can be uber savvy and save things for stenciling or something, but I've learned that if I save everything, I never use anything because I have too much crap piled around to find the stuff I want. Also, I've learned that as I file my scraps, it's really hard to file scraps that have all of these holes in them.
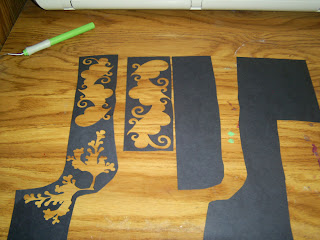
So, below you see I've cut the holey parts of the paper out. Anything reasonably large enough to use later for punched shapes or more cutting, I'll keep. Anything else, I recycle. I'll recycle the pieces with the holes and keep the strips, which are already in my plain black cardstock scrap file as we speak.
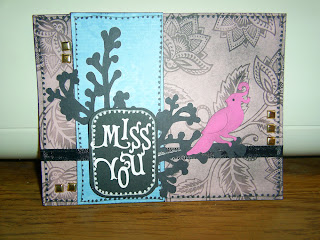
I figured I'd show the card I made with the branches here, too, since I messed with it a bit. I decided that I couldn't get just the right angle I wanted with the piece exactly as it was, so I cut it at the joining point and slightly angled the bottom piece.
Then I stuck a cutesy thing on top. The letters are cut from the Storybook cartridge, too, using the Fancy/Corner option. I also cut the little bird from the Storybook cartridge. I thought it looked so cute, looking behind itself like that, almost like it is all solitary, looking for another bird. I like to use that one a lot on cards for missing people.
Okay, so thar she be. More tips to come, I'm sure... If you found this particularly helpful, please leave a comment. And if you tell me I need to get the software, you can refer to my comment above. ^_~

This was really helpful. Thank you. I had been just using trial and error - and you know how great that is. Ha, ha. I end up with cutouts that are just a little too big, or a little too small - and then what do you do with them. So, I really appreciate this tip.
ReplyDelete