You can use these in card making or scrapbooking. I've done an example of pretty big photo corners in the tutorial because huge embellishments seem to be a fad that isn't fading any time soon. You could buy these, of course, or even buy punches to make them. But why not just make them yourself? Save some dough. Save some trees (read: use your scraps!).
Photo Corner Tutorial
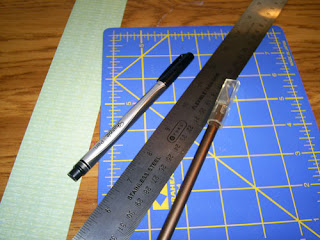
Supplies:
Cardstock/paper of choice (I used a double sided paper from K & Company's Classic Designer Paper Pad)
Marker/Pen (I'm using an acid free sharpie pen because it soaks into the paper and dries quickly, but any other kind of felt tip pen will do)
Ink (for inking edges of finished photo corners, if desired) (I used a VersaMagic DewDrop in Jumbo Java)
Tools:
Metal ruler with cork bottom (for cutting... or just use a plastic ruler, but be warned: you might get frustrated from repeatedly cutting your ruler instead of your paper)
Craft knife with sharp blade (as in if you haven't changed the blade in five years, CHANGE it. The old, dull blade is why you hate cutting with the craft knife.)
Cutting mat (mine is a very small quilting mat picked up for about $7.00 in the quilting section at JoAnn)
Scissors
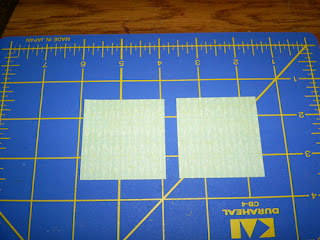
1. Decide on the finished size of your photo corners. Like I said, I was going for big, so I'm starting with 2" squares.
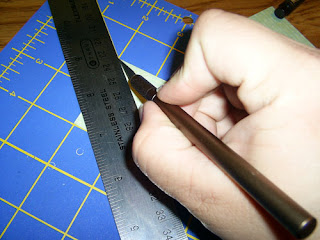
2. Slice the square from corner to corner using the ruler and the craft knife (with your SHARP blade, right?). My cutting mat has a handy-dandy 45 degree angle across it to help with cutting. I didn't find it helped so much, but you might find it useful to line yours up if you have one. Alternatively, if you just HATE your craft knife (but I really think you should try switching the blade out and give it another go), use the ruler and the marker to trace a line from corner to corner (on the BACK of the square), then cut that line with some scissors.
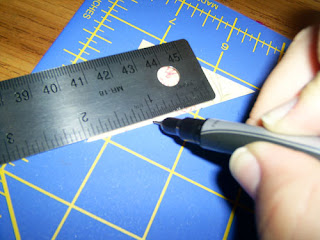
3. Measure from the very corner, along the longest side of your triangle, to the point at which you feel you'll make a good sized photo corner. I'm measuring one inch from the corner. (I'm using the 2" mark on my ruler as the 0" mark in this photo) Measure the same distance from both corners and make a mark on the BACK of the triangle.
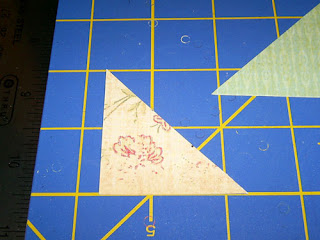
4. Using your cutting mat, line up the bottom of your triangle (looking at the back) with one of the horizontal grid marks. Line up one of your marks with a vertical grid mark, as pictured.
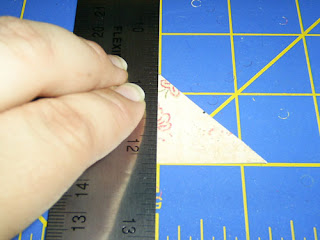
5. Line your ruler up along that vertical grid mark and draw a line from the top to the bottom of the triangle. Using the grid lines to line up your triangle/marks will allow you to draw lines at the right angles so that you'll create really nice looking photo corners.
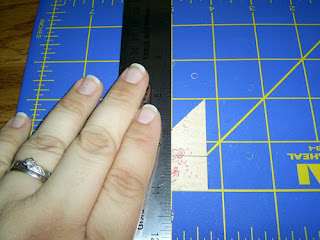
6. Do this same thing for your other mark, flipping the triangle around and lining everything up as showin in the photo above.
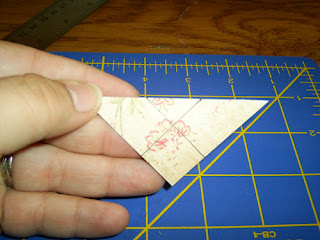
7. This is what you should end up with after doing steps 5 and 6.
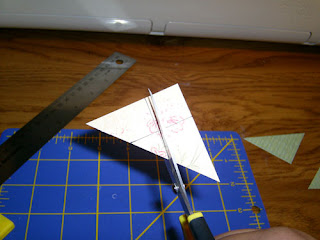
8. Cut out the small triangle.
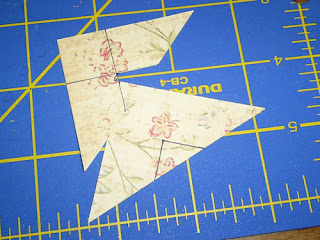
9. To make a second photo corner, you can save yourself some hassle by using the first one you just made. Line it up with the other triangle you have (from cutting the original square apart) and just trace the cut out part onto the uncut triangle (make sure to trace on the back!). To keep it the same size, when cutting this triangle, make sure that you're cutting on the outside of the traced line. Try to cut out the triangle in such a way that the little triangle keeps the black lines on it.
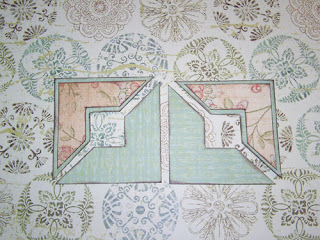
10. You can make different sizes and layer these together for cool looks. I inked all of the edges above with the Jumbo Java ink. The layered photo corners above were made starting with a 1 3/4" square which was cut into the larger triangles. Each triangle was then marked at 3"4 from each corner before the lines were drawn inside and the small inner triangles cut out. In general, a good proportioned photo corner seems to be one that is made by marking the cut triangles at 1/2 the measurement of the original square. For instance, in my example, I used a 2" square and marked from the corners of the cut triangles at 1" from each corner before drawing my lines and cutting. In order to make a nice layer (basically 1/8" all around), I just decreased all of the measurements by 1/4", just like you'd do for any scrapping project.
For tiny photo squares (say squares that start off at 3/4"), you can just eyeball and cut the squares in half with your scissors. Still mark and draw lines, however, to get a good look to the cut out piece in the middles.
Also, in order to make things easy on yourself: If you REALLY love a certain size and want to use a lot of them in your work, make yourself a template or two out of white cardstock. That way you can just make your square, cut it in half, and then use the template to draw the inner triangle and then cut that out.
Hopefully someone finds this useful! I'm going to make some fancy-schmancy glittery ones, and sequin covered ones... I'm having fun!

I often make my own photo corners like this and I really love being able to have my own custom photo corners! I usually eyeball the cutting but they aren't always exact so the measuring is something I'll probably start doing more often!
ReplyDeleteKathy, I had to chuckle when I read how you do your photo corners. I looked at all the tools you had out then said to myself, "I sure am glad I have the quikutz and sizzix photo corners. Sure makes doing these a lot faster and easier. Then again I am such a tool and gadget gal. LOL
ReplyDeleteYeah, I have SO many gadgets and could cut them easily with my cricut, but I felt like showing how to make them without the fancy tools. ^_^
ReplyDelete